
At Kaazing, we have been experimenting with using a smartphone as a remote control for quite some time now. Those
familiar with our demos may have seen our Zing-Pong demo (which is a “Pong”-style game using smartphones to control the paddles over WebSocket) or our Racer demo (which is a 3D Formula One car rendered in WebGL as a Chrome Experiment, and remotely controlled with a smartphone). These demos, along with the other demos we’ve created with Kaazing’s platform, use no plug-ins. You simply point a browser on your computer to the address of the object you want to control (for example, the gorgeous Formula One car rendered in WebGL) and a browser from your smartphone to the address of the remote control (an ID we generate for you). Once connected, you just…go!
A couple of our Visionary Zingers, Prashant Khanal and David Witherspoon, then experimented with communicating with a Raspberry Pi using WebSocket–or, more specifically, using Kaazing’s JMS-over-WebSocket Gateway to tell a Raspberry Pi to turn on and off a lightbulb. When the lightbulb turned on in this experiment, another lightbulb turned on: could we in fact turn a remote, radio-controlled car into a remote, WebSocket-controlled car? By controlling the car over the Web, could we control the car from another room? From another continent?
The Racer Demo
Let’s first take a closer look at the Racer demo. The Racer demo uses the reflector pattern: where we connect devices through a WebSocket server, thus simulating peer-to-peer connectivity, a very easy-to-achieve task using pub/sub. When we developed the Racer demo, we walked through the steps to build it in The Simplest Way to Use Your Smartphone as a Game Controller: A WebSocket Race Car Demo. By examining how to use pub/sub concepts to control a virtual car, it’s not so farfetched to consider doing the same with a radio-controlled car.
The Goal
After working with the Racer demo, we knew what we wanted to achieve: controlling a “real” car (or at least a
good-sized monster truck model) with a simple web app on a smartphone. Something like this, for example:
And something that might move like this:
In just a few hours of hacking and experimenting, we turned this radio-controlled car into a WebSocket-controlled
car. Don’t worry, no actual cars (or bunnies) were harmed in the making of this demo, as you’ll see as we walk
through the hardware and software we used.
Ingredients: The Hardware
- One RC car. We ended up using a black F150. The bigger the car, the easier it is to connect, position, and hide the building blocks. One thing to pay attention to is that the car you’re about to buy has to have two simple motors, one that drives the vehicle forward/backward, and another one that steers the car: front wheels left/right. The first thing you’ll get rid of is the radio control, so don’t worry about that too much.
- One Raspberry Pi, model B. This piece of hardware is incredible. Runs Linux (and Java), has 512MB RAM, an Ethernet port, 2 USB ports (for keyboard, mouse, WiFi), takes an SD card, has an HDMI out, and has a handful of GPIO (General Purpose Input/Output) pins to drive external devices, like lights, motors, and alike.
- One small breadboard. This simplifies connecting the building blocks.
- Set of male to male and male to female jumper leads.
- Edimax USB Wireless adapter. Follow simple setup instructions.
- L298N Board: It is used to control the car motors. The car is equipped with two motors – one for steering and the other to drive wheels. Each motor is controlled through two GPIO pins.
- A couple of LEDs – optional. This RC car model didn’t come with any lights, but who has seen a serious RC car without lights – so we equipped ours with remote controllable LEDs.
- One smartphone (can be substituted by a tablet, or any Web browser, really). Using a touch-based device makes the controlling more natural, but you can use any laptop/desktop browser with mouse/trackpad as well.
- Battery. Anker Astro 5600 mAh external battery pack powering the Raspberry Pi and connected circuits: LEDs and relays.
The circuit diagram regarding the wiring among the Raspberry Pi GPIO pins, L298N board and the car battery can be found here. The pin numbers specified for the Raspberry Pi in the circuit diagram refers to the physical pin location.
Ingredients: The Software
- WebSocket Server. We used Kaazing’s high performance enterprise grade WebSocket Gateway – JMS Edition. The JMS Edition provides an easy-to-use pub/sub abstraction, along with support for multiple WebSocket client technologies (of which we used the JavaScript and Java clients in the project). The WebSocket Gateway ships with Apache ActiveMQ, an open source message broker.
- WebSocket JavaScript client code. The Kaazing JavaScript client code runs in the browser on the smartphone (or any other web browser), playing the role of the remote control. The user’s actions trigger events on the remote control and result in messages being sent to the WebSocket server.
- WebSocket Java client code. The Kaazing Java client runs on the Raspberry Pi, receiving messages from the WebSocket server, and instructing the Raspberry Pi GPIO pins to control the car. Control of the GPIO pins is achieved through the Pi4J Library.
Reviewing the Hardware
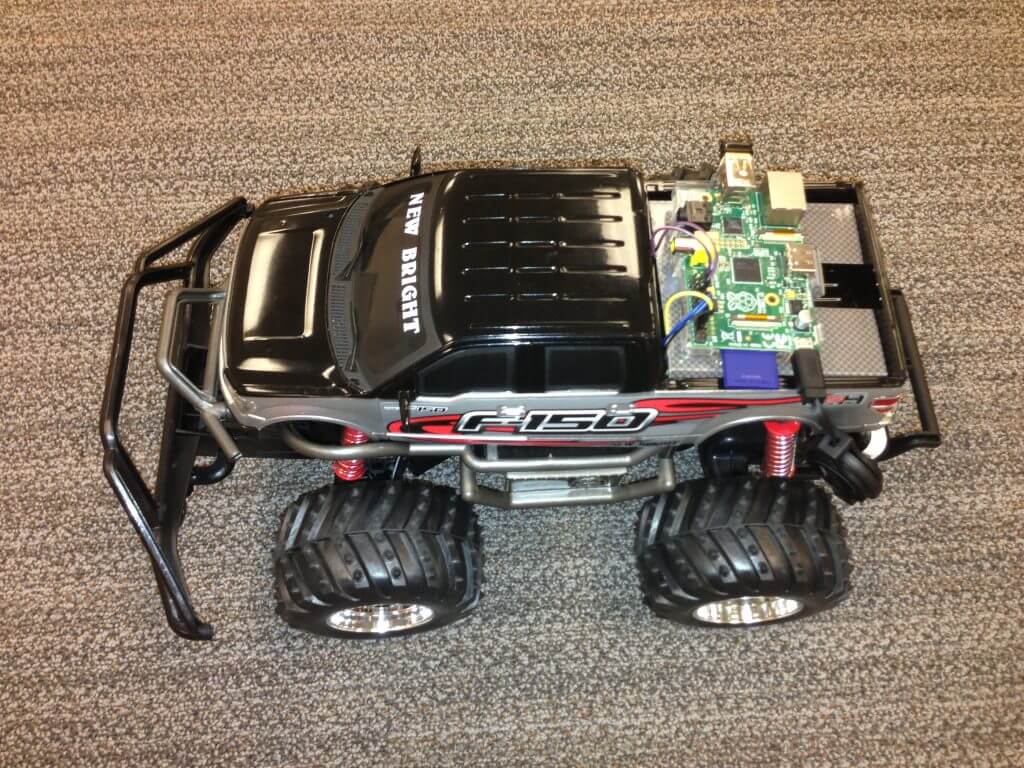
We decided to hide all the electronics in the body of the car, but wanted to have the Raspberry Pi accessible and
more importantly, visible. It’s sitting on the truck’s plateau, lightly taped to it, so it doesn’t fall off as the
truck accelerates and comes to sudden stops (read: bumps into things).

On the right you can see the WiFi plugged into the top USB port (blue LED). On the left, you see the blue SD card. The GPIO ports are on the top left, connected to drive the two motors and the lights of the truck. The Raspberry Pi is powered through a micro USB port on the bottom left, leveraging a smartphone quick charger battery.
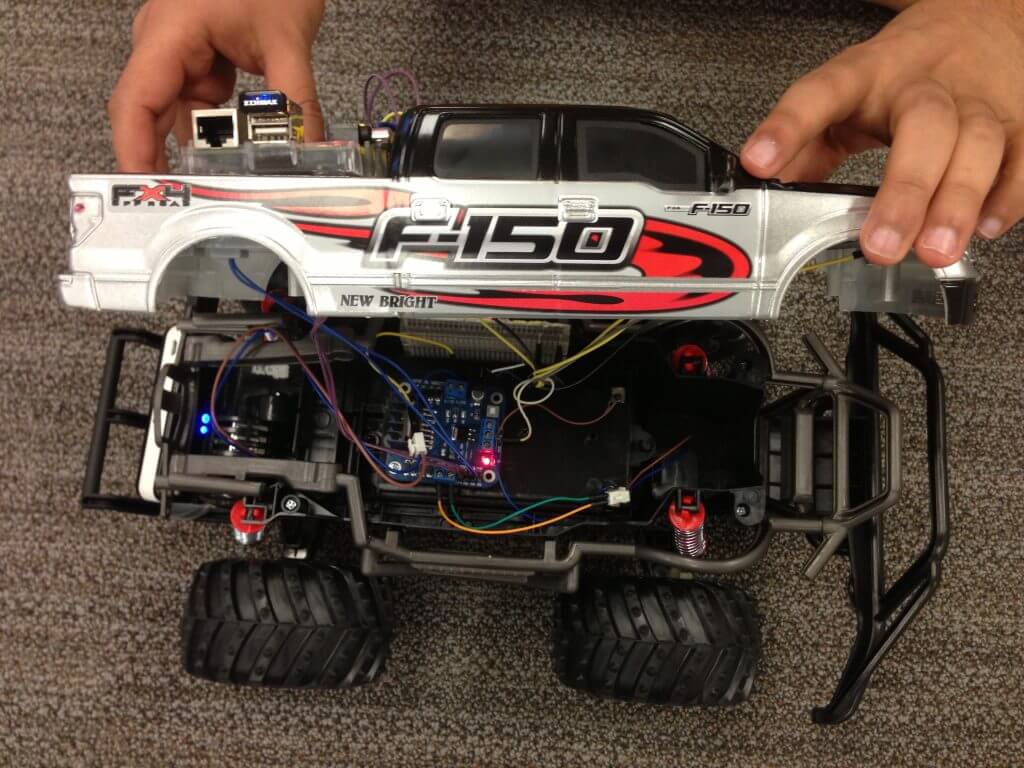
Under the “hood”, you can see the relay, and the breadboard connecting to the Pi, and the motors of the truck, as well as the front LEDs.
Reviewing the Software
To enable the Raspberry Pi to receive WebSocket messages from the browser client, we had to write some logic that
runs on the Pi.
Architecture
The two clients, the smartphone remote control, and the code running on the Raspberry Pi, communicate with each other via WebSocket. In addition to JavaScript clients, Kaazing supports Java, .NET, and Flash/Flex clients. We chose the Java client for the Pi. The communication between these clients is seamless.
The back-end message broker, which provides the messaging services is Apache ActiveMQ, but could be another JMS
message broker like TIBCO’s Informatica’s, or IBM’s, as well.

JavaScript Remote Control Code on the Smartphone
Since we plan to use this demo at trade shows, we wanted to make sure that we have a certain level of control over
who controls the car and when. Therefore, we use a “secret” key that the remote control has to know to control the
car. This key is sent to the code running on the Pi via a secured admin topic. Every message coming from the
smartphone has to contain the same key. If it doesn’t, the message is thrown away. The remote control client on the
smartphone first asks for the key that identifies who can control the car.

Then, the HTML5 remote control code, which runs on the smartphone, first establishes a connection to the WebSocket server. It creates a JMS topic, and a producer (or publisher) for the topic. When done, the client is ready to start sending messages through the WebSocket gateway to the Java code running on the Pi. Every message contains the previously specified key as well, as a custom JMS message property. The images rendered for the remote control UI in the browser have JavaScript event listeners defined. The listeners are invoked both when the images are touched (touchstart), as well as when the images as released (touchend). The JavaScript client code sends messages as frequently as it can while one or more buttons are pressed, and one message as a control icon is let go.

If you want to learn more and understand the JavaScript JMS APIs, try out the Step-by-Step Tutorial of Building a Simple Peer-to-Peer WebSocket Application tutorial or our API documentation.
Java Code Running on the Raspberry Pi
We chose to program the Raspberry Pi using Java. Instructions to install Java on the Raspberry Pi can be found here. The Java code on the raspberry requires both the JMS Kaazing Websocket Library to receive messages from the client,
and the Pi4J library to interact with the car through the Rasbperry Pi’s GPIO. The code is split into two main classes, CommandReceiver and Car. CommandReceiver is responsible for
connecting to the Kaazing JMS Gateway and listening to both on the command and the admin topic. When admin messages
are received the CommandReceiver will record which user has valid access to control the car. When a command message
is received, its properties will be checked to see if it is the current user in control of the car. If so, the message will be parsed and read, resulting in a corresponding method being called on the Car class. The Car class is an abstraction of everything the car may do. It has methods such as Steering, Thrust, and Lights that are called
with Command parameters such as ON, OFF, LEFT, and RIGHT. When called, the GPIO inputs corresponding to each method and are switched on or off, thereby resulting on the motors of the car moving forward, backwards, or steering left
or right. To check out or download the full source code visit KaazingPi on Github.