
Overview
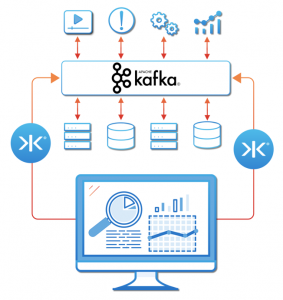
kaazing.io is an iPaaS that allows you to build highly resilient and scalable real-time mobile and web apps powered by Apache Kafka. It works by seamlessly extending Kafka data streams over the web using Server Sent Events (SSE).
Setting up kaazing.io is very easy. You configure it to connect to your Kafka broker, and nominate which topics you’d like to stream. Clients then connect to kaazing.io and receive streaming data.
The Google Cloud Platform (GCP) facilitates getting started with Kafka by offering a hosted version of the distributed stream processing platform. In this article we’ll walk through the steps to quickly deploy Kafka on GCP and then connect kaazing.io to it. After you complete the setup below, you’ll have live SSE endpoints which you can drop into your client code and power everything from dashboards, to chat apps, to real-time geo-tracking features.
Following is everything that is required to use kaazing.io:
- Have a Kafka broker running and accessible from the internet
- Use the kaazing.io console to configure the topics you want to use
- Connect to kaazing.io from your application and start streaming data!
Now let’s get started!
Deploying The Kafka Broker
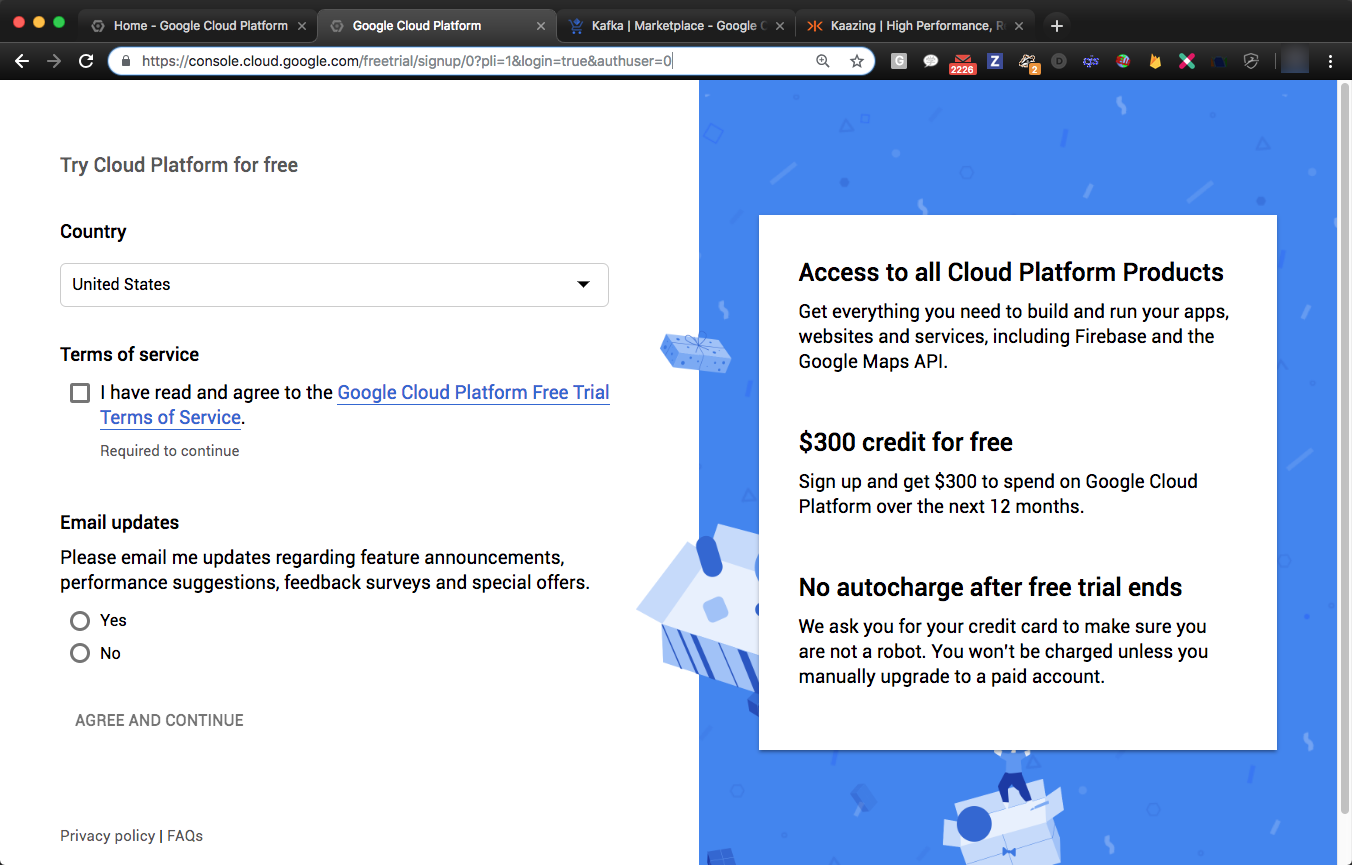
Step 1. Register for a Google Cloud Platform Free Trial
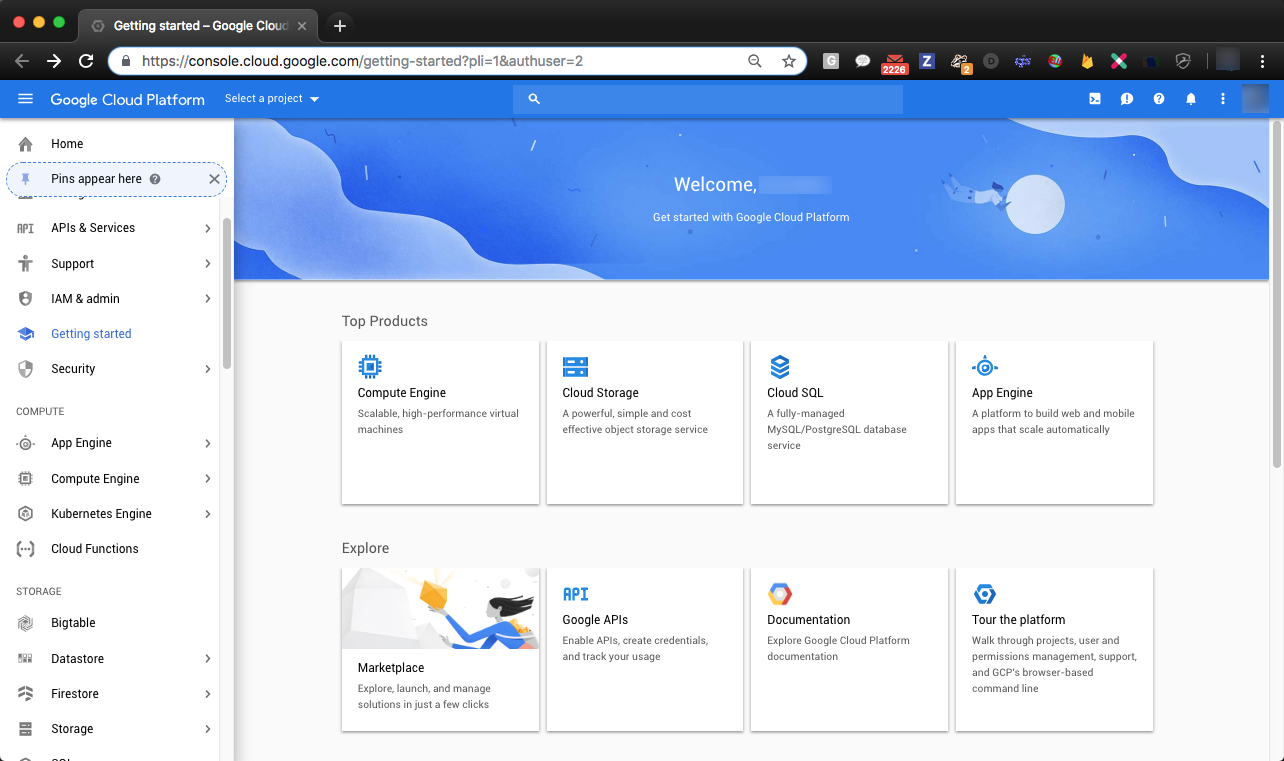
Step 2. Navigate to the Google Cloud Platform Dashboard
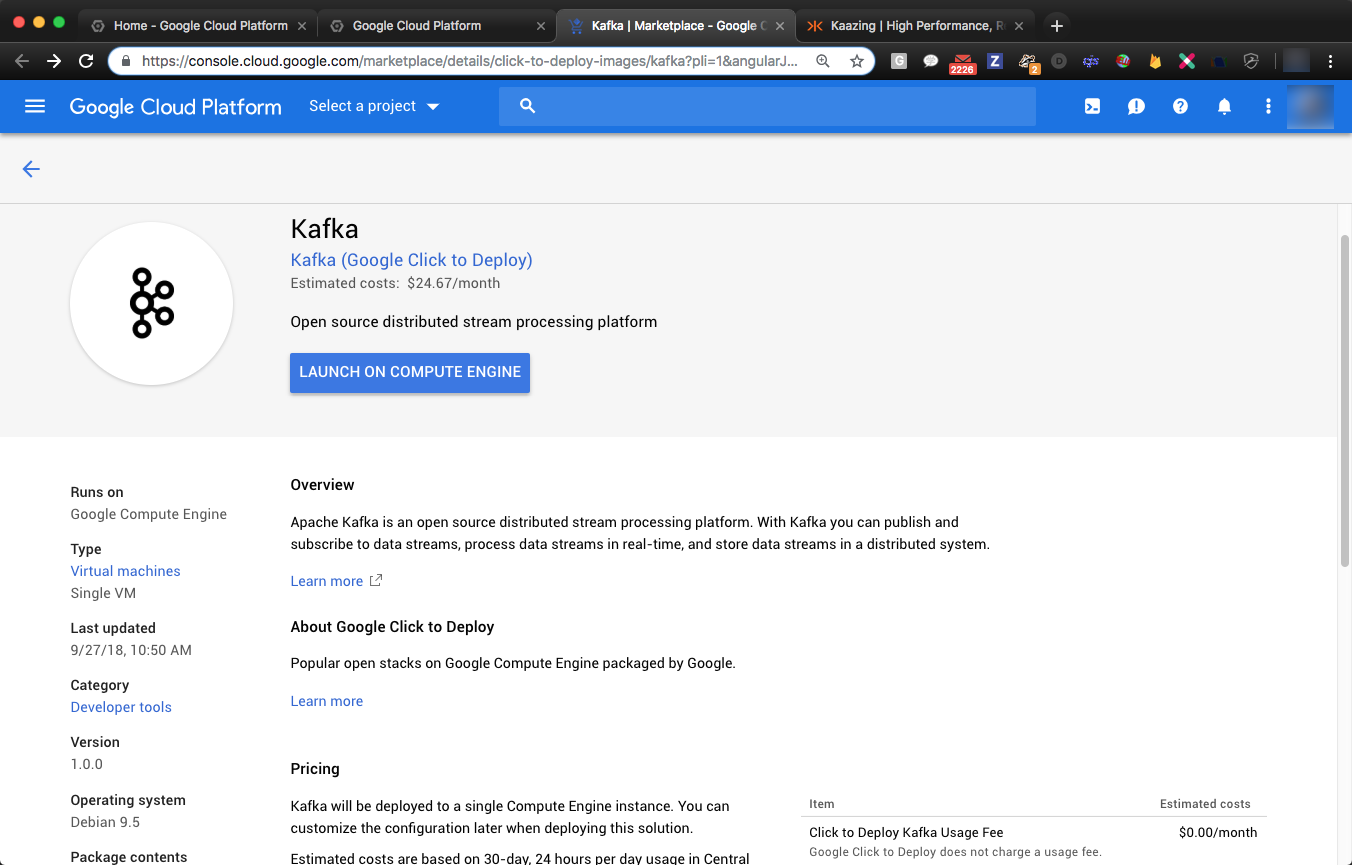
Step 3. Launch Kafka using One-click Kafka Deployment
Step 4. Create a Project
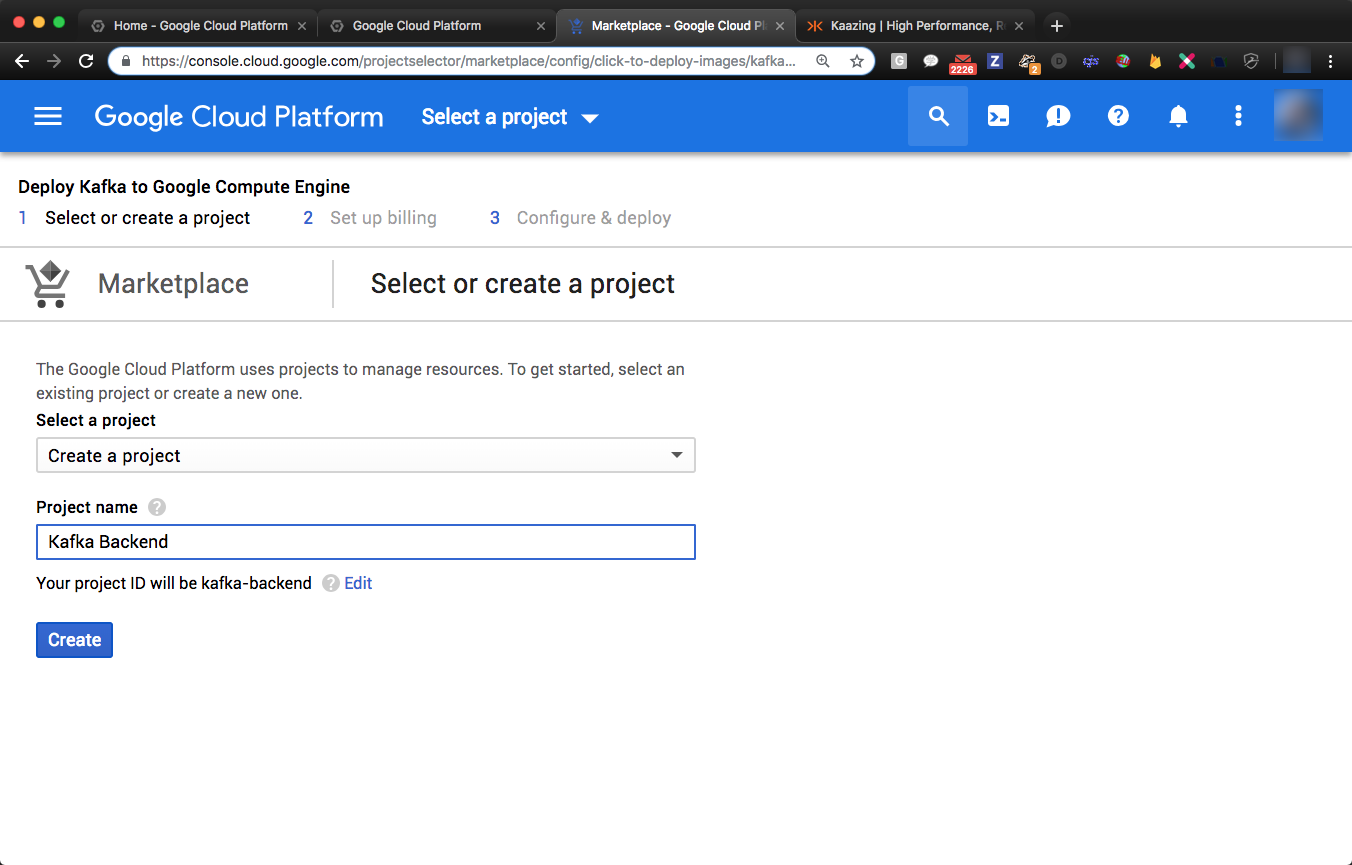
Name your project and click “Create”
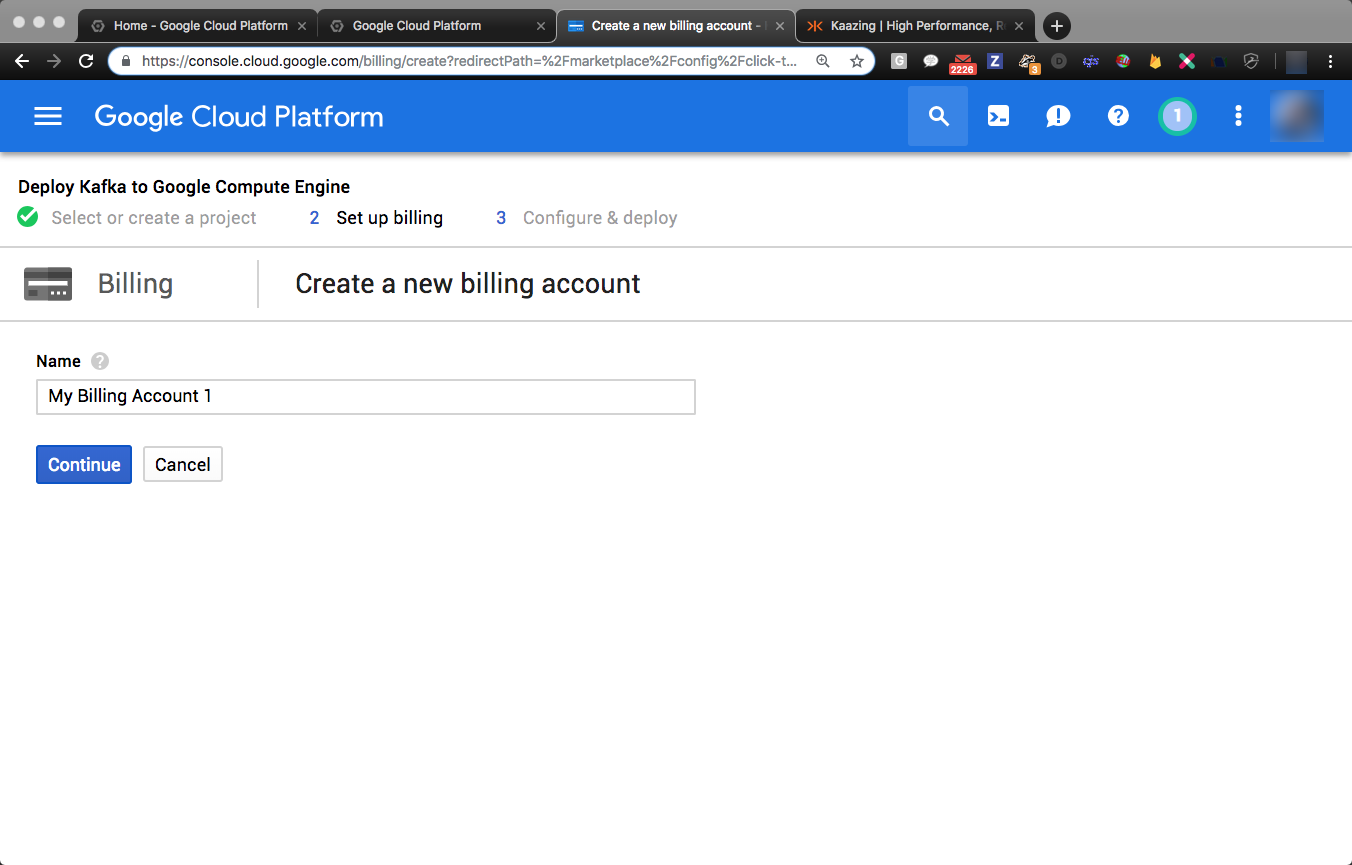
Step 5. If prompted, create a new billing account and enable it
Step 6. Deploy Resources
After creating your billing account you will be returned to the Launch screen. Click on “Launch On Compute Engine” to proceed to the deployment configuration page.
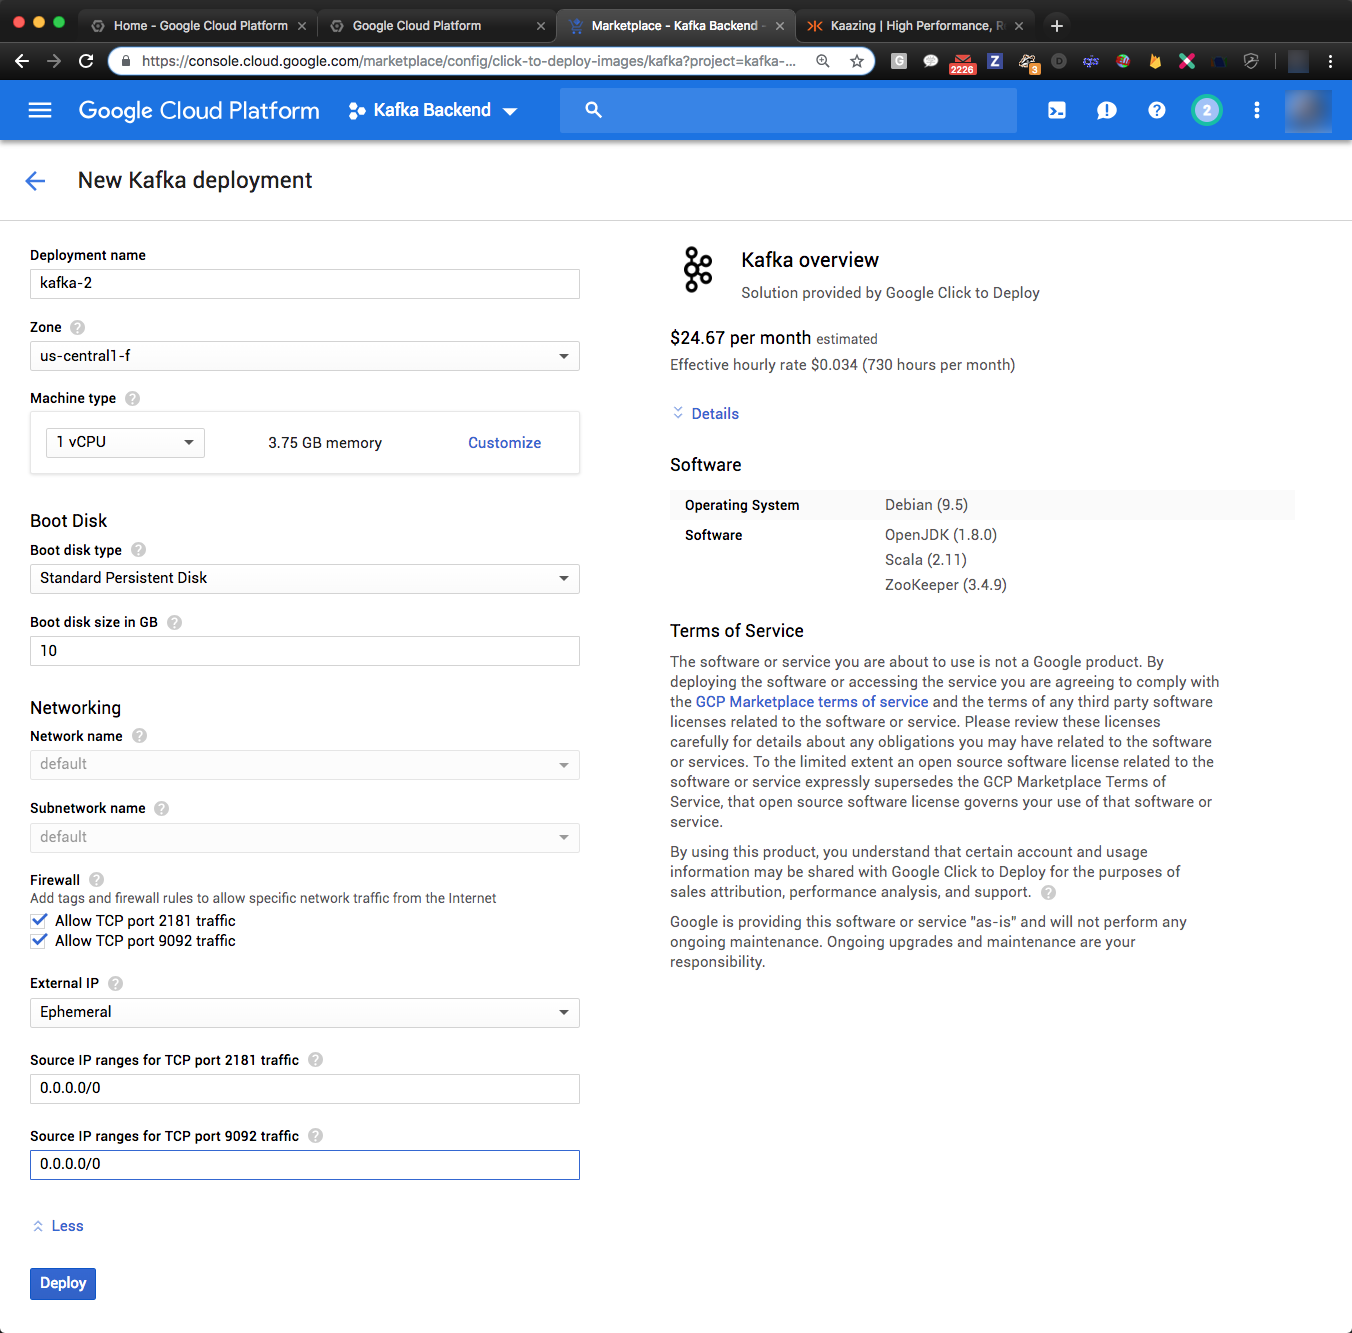
Ensure that under the Firewall section both “Allow TCP port 2181 and 9092” are checked. Click on “More” and set the “Source IP” ranges for both ports to “0.0.0.0/0” then click on “Deploy”.
Deployment will take a few minutes and when completed the “Suggested next steps” block will be displayed on the right side of the page.
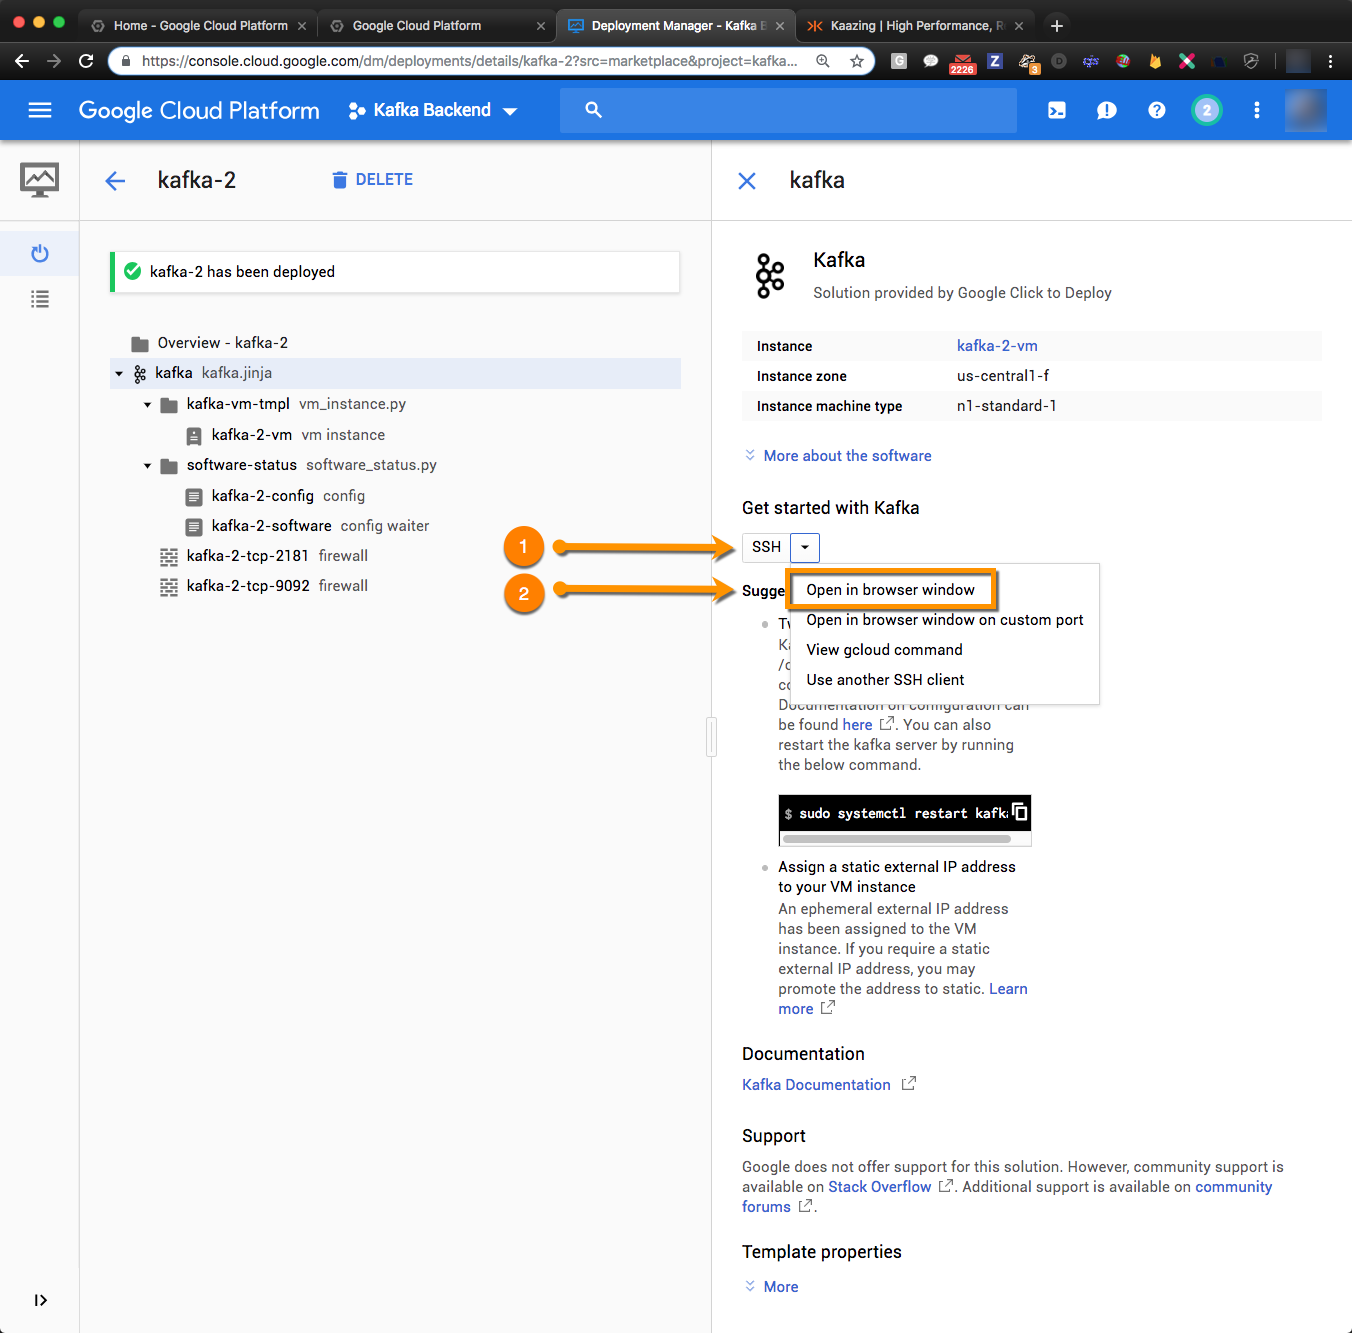
Step 7. Configure the Kafka Broker
Before we can link the Kafka broker to kaazing.io we need to configure it to listen on its public network interface. To do so select “Open in browser window” from the SSH pulldown menu (1 & 2).
Once the terminal window becomes available, copy and paste the command below (including double quotes) to update the kafka configuration file (/opt/kafkaf/config/server.properties) such that the broker listens for connections on its public interface:
sudo bash -c “$(wget -O – https://s3.amazonaws.com/kaazingio-scripts/update-kafka-config.sh)”
(Show me update-kafka-config.sh)
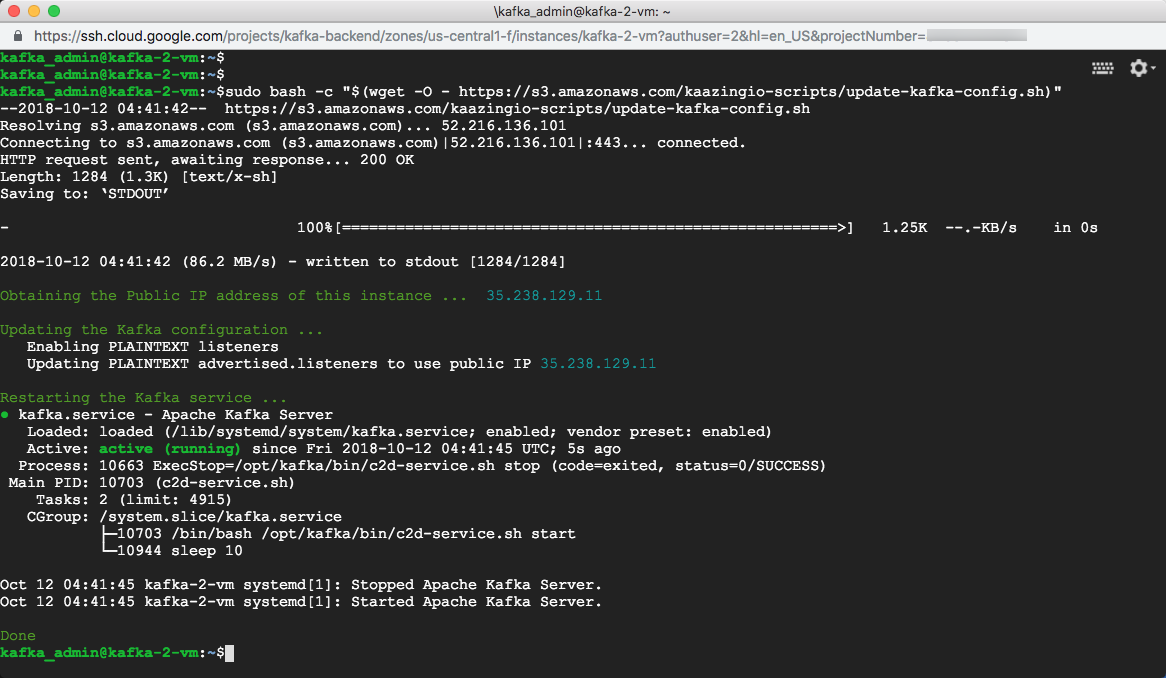
Congratulations! You now have a Kafka broker that is publicly available and listening for connections on port 9092. Please make a note of the public IP address of your Kafka instance as it will be required in later steps. In our example the public IP address is 35.238.129.11.
Step 8. Publish Messages to Topics on the Kafka Broker
Run the following command in the instance terminal window to publish messages to the topic demo.events:
bash -c “$(wget -O – https://s3.amazonaws.com/kaazingio-scripts/publish-to-kafka.sh)”
(Show me update-to-kafka.sh)

While messages are being published go ahead and head over to kaazing.io to configure a new streaming endpoint.
Configuring kaazing.io
Next we will register for and configure kaazing.io to work with our newly minted Kafka broker.
Step 1. Subscribe to kaazing.io and Create an App
To subscribe for the kaazing.io streaming service head over to https://console.kaazing.io and follow the instructions provided.
Once you have subscribed and logged into your kaazing.io account, click the “ADD A NEW APP” button to reach the “Add a new app” screen.
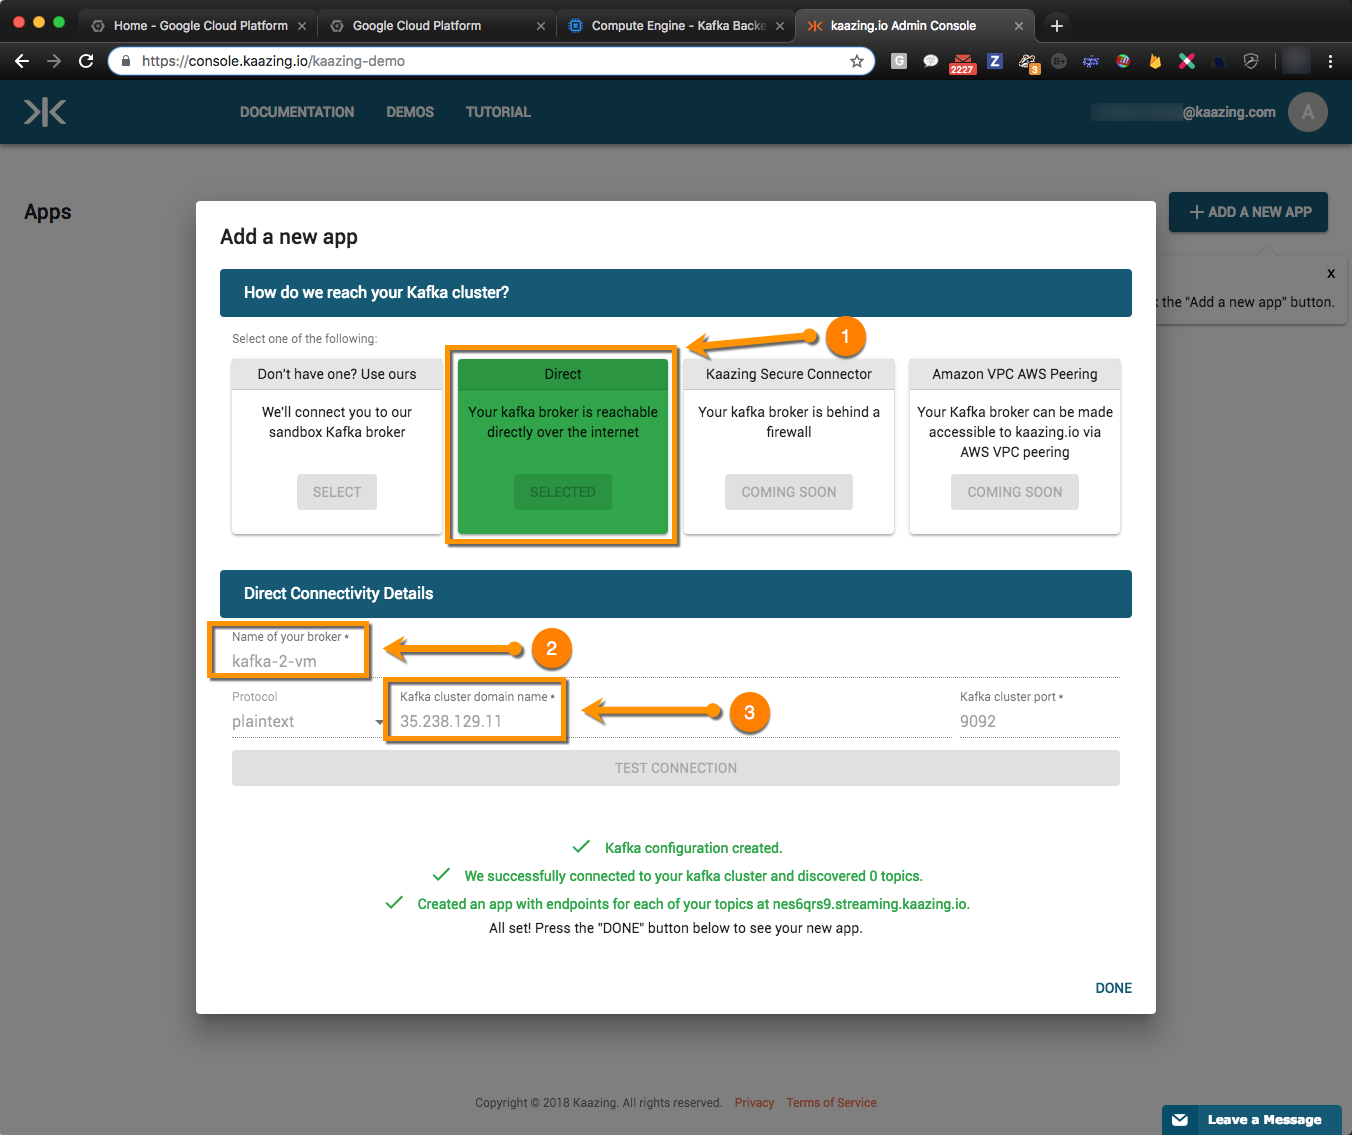
Select the “Direct” option (1), enter a name for your broker (2) as well as the instance public IP address that you noted down earlier in the “Kafka cluster domain name” field (3). You can also retrieve the instance public IP address via the GCP Dashboard and selecting “Resources” for the project created in Step 4 above.
Step 2. Create a Server-Sent Events Endpoint
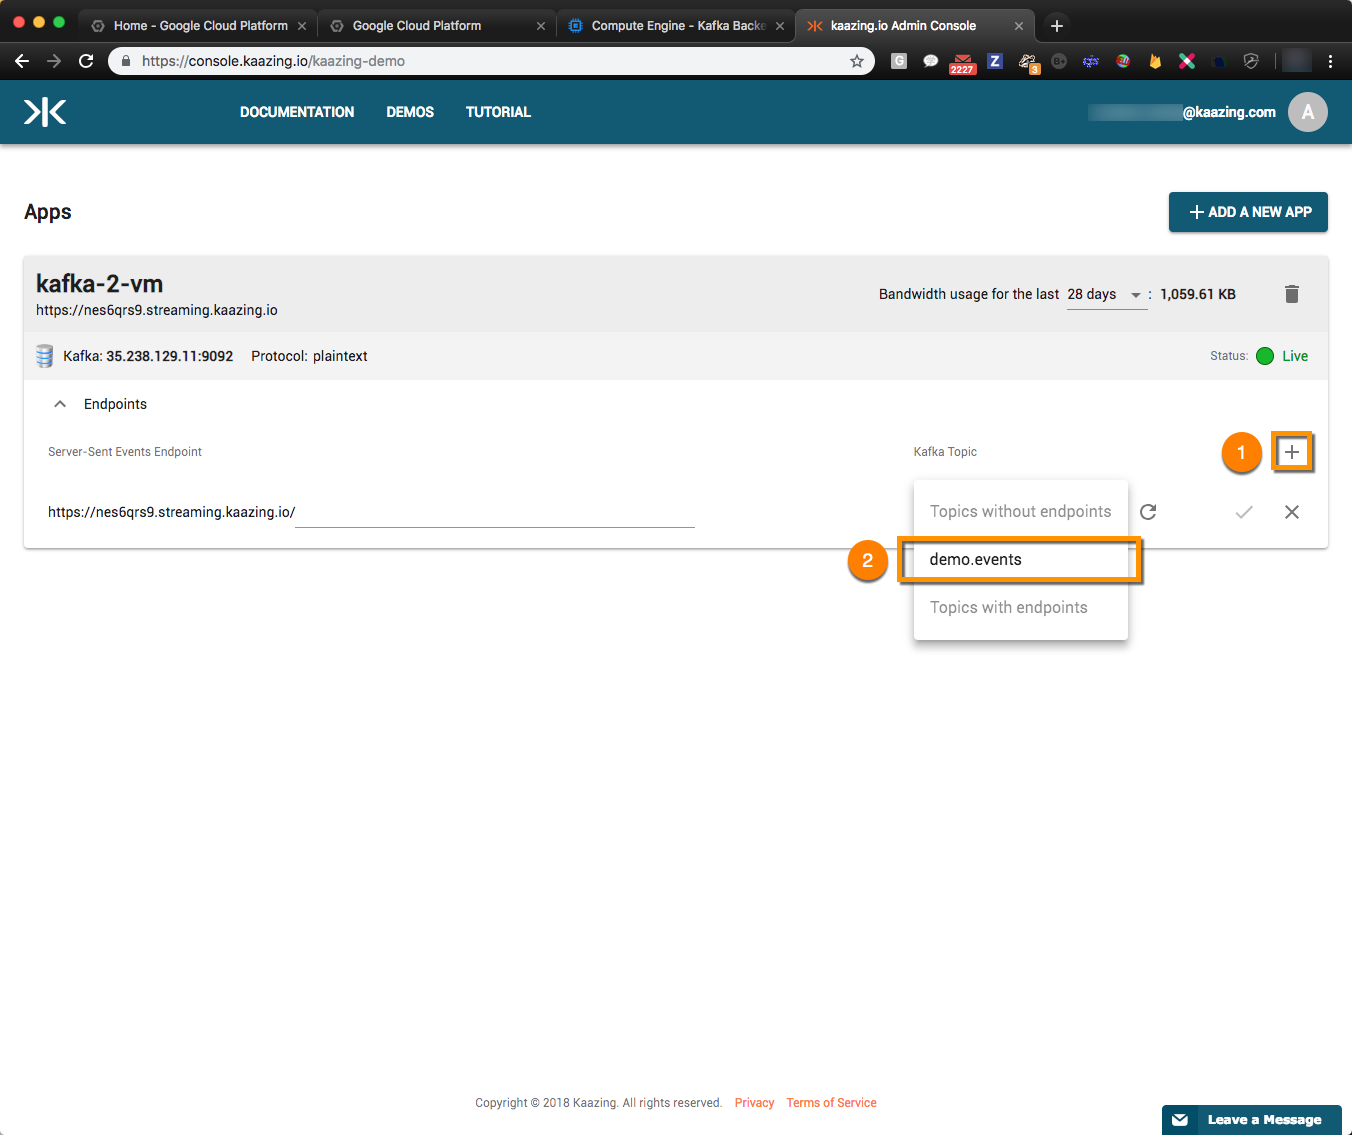
Once the Status field shows that your application is “Live”, proceed to creating an endpoint:
- Click + to add a new Endpoint
- Select demo.events from the Kafka Topic pulldown menu
- Click on ✔︎ and wait for endpoint creation to complete
- Click the “Show live data” button
 to subscribe to the topic and view streaming data
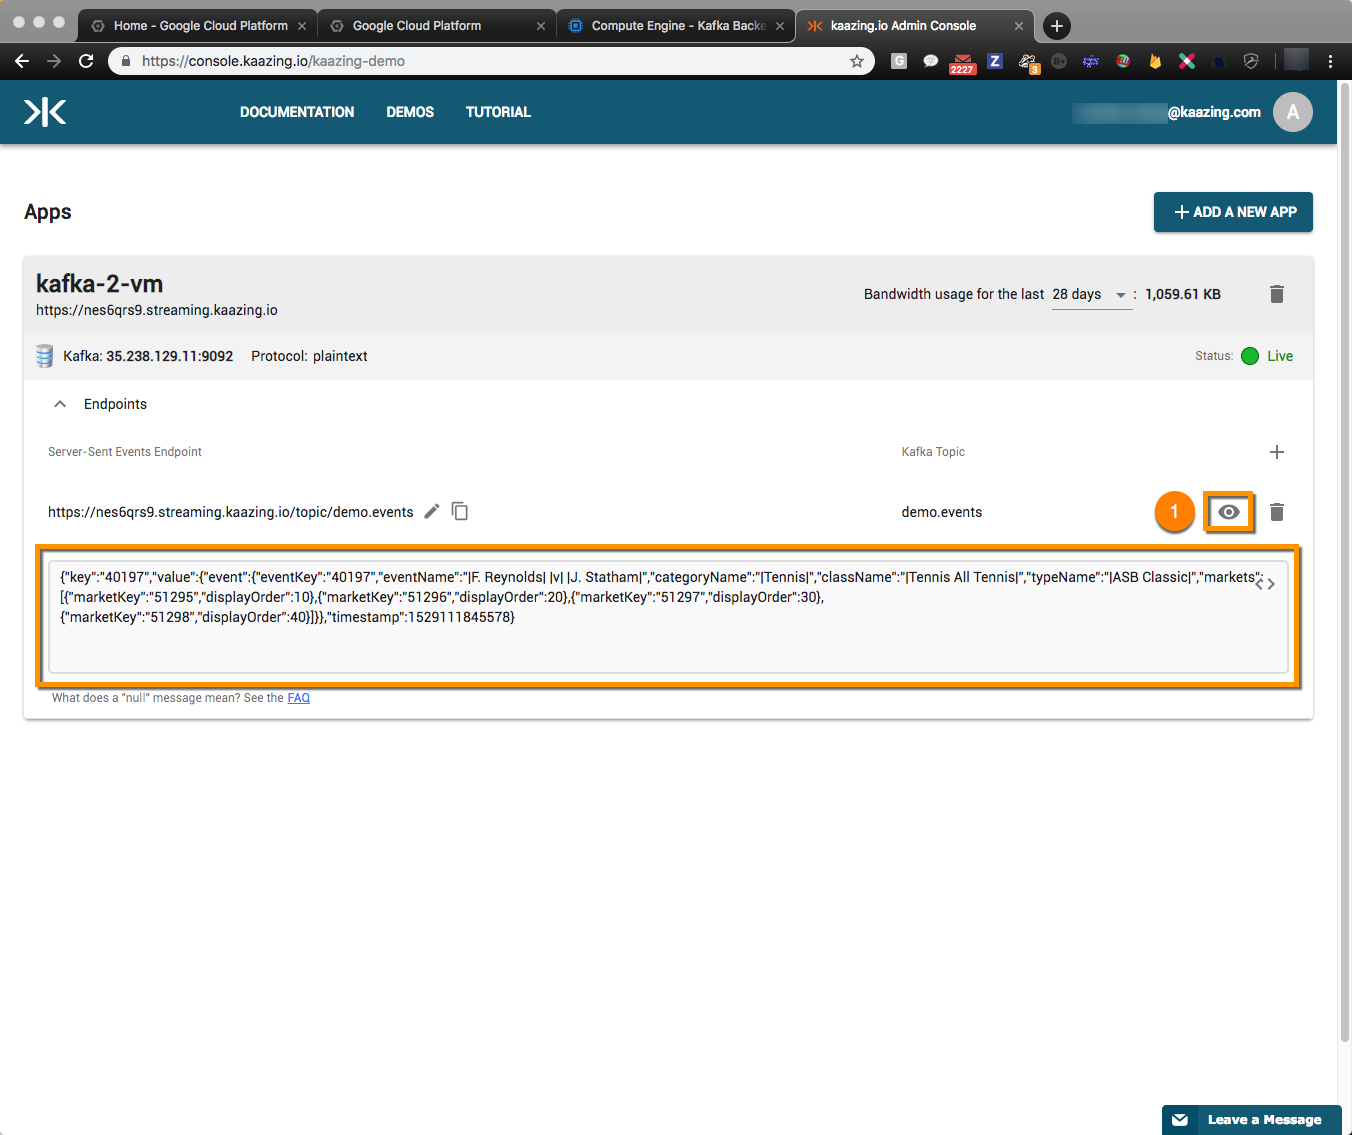
Note: If you do not see messages streaming then repeat Step 8 above to publish new messages.
Conclusion
Apache Kafka is a powerful technology when it comes to establishing streaming capabilities between server-side services; however, it also can act as an extremely effective backend for real-time frontend applications and features. As we had demonstrated in this article, kaazing.io quickly unlocks this capability of Kafka (especially if it is hosted on the Google Cloud Platform) by extending its data streams over the web using Server Sent Events.
If you have questions, shoot us a tweet @kaazing

Troubleshooting
Testing connections to the Kafka broker
To test your connection you could install and use a tool such as Kafka Tool. Installation, configuration and usage steps are provided on the Kafka Tool homepage.
Step 1. Create a Single Broker Kafka Cluster
- Download and install Kafka Tool
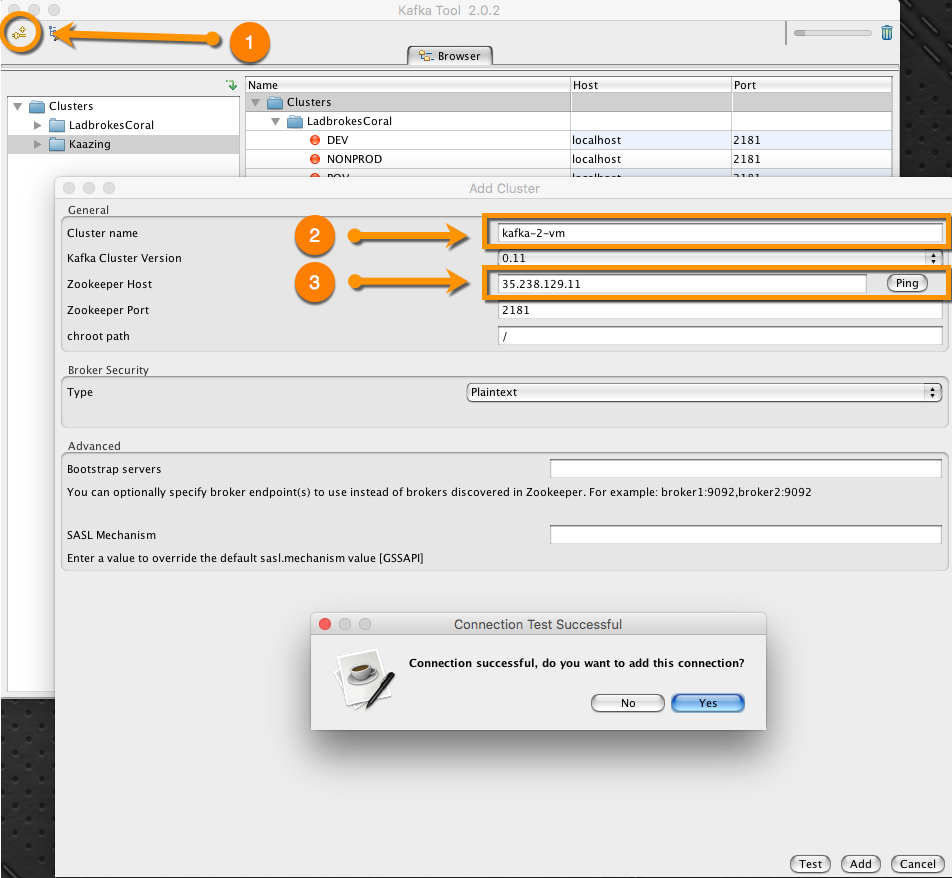
- Click on the “Add Cluster” button (1)
- Fill in Cluster Name (2)
- Fill in Zookeeper Host (3)
- Click “Test” and check for a successful connection then click “Yes” within the test popup window to finish adding the connection
Step 2. Test Connectivity to the Kafka Broker
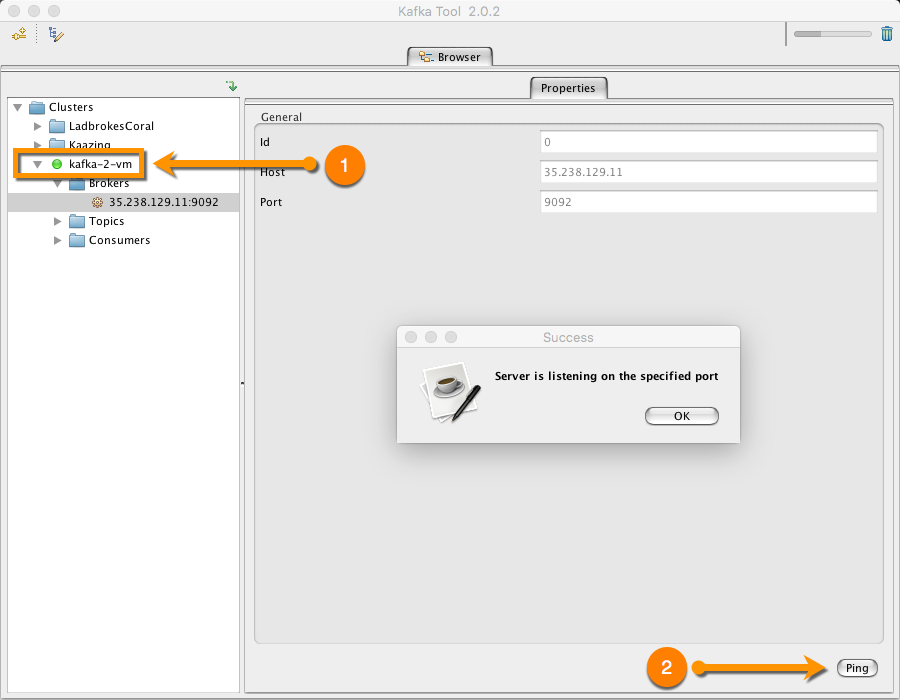
- Click on the name of the Kafka broker (1)
- Click on the “Brokers” folder to display the broker IP and port
- Click on the “Ping” button (2)
Similarly you can click on “Topics” to view a list of existing topics. For additional information on how to use Kafka Tool visit their features webpage.